Hey Ya’ll,
So over the weekend I painted the island in the kitchen. I ended up going with a totally different color than what I originally was gonna do.
Note the samples below and Maverick photo bombing.
Here are the steps I followed:
1. Remove all doors and hardware
2. Sand lightly: The hubs and baby and I went to Lowe’s and bought a small sander that looks like a clothes iron. It had a lovely little filter contraption on the back that caught the stuff I sanded off. Like this one. It did the trick quite nicely; I used 220 grit sandpaper…or was it 180 grit? You just want to get the glossy look and feel off. Our cabinets are painted with oil based paint so sanding was necessary.
3. Wipe the surfaces down after sanding to get all the gunk off.
4. Primer: I slapped on one coat of primer using a small trim brush and small foam roller brush. Also from Lowe’s; we get a military discount when we remember to show our IDs, which helps out from time to time. The foam roller really gave a nice finish. I bought some all purpose primer the paint guy really talked up. It didn’t work miracles or anything but it did the trick.
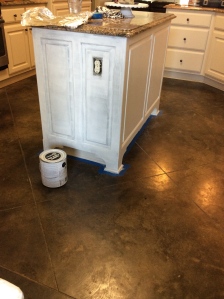
Here is the island with one coat of primer
5. After the primer is good and dry, start rolling on your paint. Now for my paint I chose a Benjamin Moore Color: Cape May Cobblestone and had them mix it up in a gallon of that new Valspar Reserve paint. I love that stuff, it really is worth the extra money. I used the trim brush for the corners and crevices and the foam roller for the rest. Let that first coat dry for a good while, then slap on your second coat. Now it probably wouldn’t have hurt to sand lightly between coats, but at this point I had lost my patience and my 9 month old was in his walker pulling what he could reach out of the doorless cabinets. Of course destruction and terror ensued.
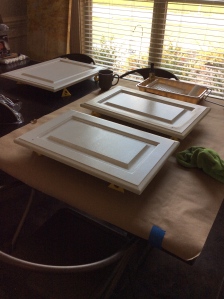
Here are the island cabinet doors with one coat of paint, or was that primer…?
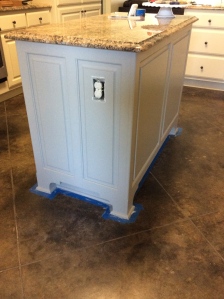
Here is the island with one coat of paint. I taped off the floor because I am a mess with edging in small spaces. It was all over the tape. Make sure to run a razor blade along the tape before you rip it up, or you’ll rip your pretty paint up too.
Finished product
I know, the lighting (a to-do and post for another time) isn’t the best, and the dark floor does nothing for that color. But I do love how it turned out! I love that color, I think I want to use it in our 5-year-plan-Farmhouse down the line.
I was surprised at how well it turned out; I almost decided to paint all the cabinets in the house, but then I flew back in from La-La Land and reality slapped me silly. The kid would be all up in those doorless cabinets wreaking havoc.
I am sweet talking my dad into installing a Statuary Marble top on my freshly painted island. He has a granite and marble fabrication company and does amazing work. I’m also dreaming of white subway tiles replacing the current backsplash.
Sometimes I think I’m crazy for changing up things like this in our less-than-a-year-old house; but if I wasn’t a little cray cray, I wouldn’t be me. 🙂
Till next time ya’ll!
In hindsight, extra tips if you are painting your cabinets (these are for you Micah :-))
1. Make sure you sand at least a bit to smooth your surfaces; you can use a sheet of sandpaper or a power sander (small one-see link above)
2. Choose your color carefully!! I suggest getting ideas from Pinterest; I did a search for “gray cabinets” to get the paint names for a couple I liked and see the paint on actual kitchen cabinets. The problem is, their lighting is probably different than the lighting in your kitchen, or the texture of your cabinets may be different, or that color looks really good on their modern style doors but looks plain awful on your super traditional style doors, etc. Sorry for rambling; my point is: you want to make sure you LOVE LOVE LOVE the color you pick for YOUR cabinets in YOUR kitchen. So, save name of the company that makes it and the name of the color and go to Lowe’s and have them mix you up a sample container for around $3. That way if you are trying to decide between 7 colors, you don’t spend a fortune. Tell them who makes the color and the name and they can make it, yes even if it is a Benjamin Moore or Sherwin Williams Color.
3. Use an all purpose primer, this will mean you have to use less actual coats of paint.
4. Apply paint and primer with foam rollers to get a smooth finish, you can use a trim brush for crevices and edges etc.
5. Get painter’s pyramids to put your cabinet doors on to paint them, it will save you a lot of headache (available at Lowe’s or here is the link on Amazon)
6. Label the doors with a piece of painters tape and a number or letter, do the same on the inside of the cabinet it corresponds to.
7. Take your time; let it dry before you put your doors back on, you will cry when you knock paint off when you hang your doors too early, trust me on this.
8. I used Valspar Reserve paint; I’ve heard good things about Sherwin Williams Acrylic Latex paint but haven’t tried it yet.
9. Sand lightly between coats
10. Reuse your paint trays and brushes by putting them in ziplock baggies and putting them in the fridge or wrapping them in foil and putting in fridge. (If you don’t have room in your fridge, they may still be reusable).
That’s all I can think of for now; I’ll add more if anything pops in my head. Good luck and please share your experiences!


Reblogged this on The Middle Sister Project and commented:
Added a list of tips for cabinet painting 🙂
LikeLike
Pingback: Kitchen Update: Before and After | The Middle Sister Project